8 Best Limestone Chips for Improving Path Drainage
Standing in a garden after a heavy rain reveals the raw mechanics of hydrology. The scent of geosmin rises from the saturated earth as water fills the pore spaces of the soil; the turgor pressure of the surrounding vegetation reaches its peak. Without proper intervention, garden paths become stagnant basins that drown the rhizosphere of adjacent plantings. Selecting the best limestone for garden path drainage requires an understanding of both hydraulic conductivity and mineral chemistry. Limestone is not merely an aesthetic choice; it is a functional tool for managing runoff and stabilizing the soil profile. By choosing the correct aggregate size and shape, you ensure that water moves vertically through the path rather than pooling on the surface. This guide focuses on the technical specifications of limestone chips to optimize drainage and maintain a stable, walkable surface in various climatic conditions.
Materials:

Limestone is a sedimentary rock composed primarily of calcium carbonate. Its presence in the garden naturally influences the soil pH, typically pushing it toward an alkaline range of 7.5 to 8.5. This shift affects the Cation Exchange Capacity (CEC) by increasing the availability of calcium and magnesium while potentially sequestering micronutrients like iron and manganese.
The ideal substrate for a limestone path is a friable loam with a balanced NPK ratio of 10-10-10 in the surrounding beds to offset potential leaching. You must consider the following eight limestone varieties based on their drainage capabilities:
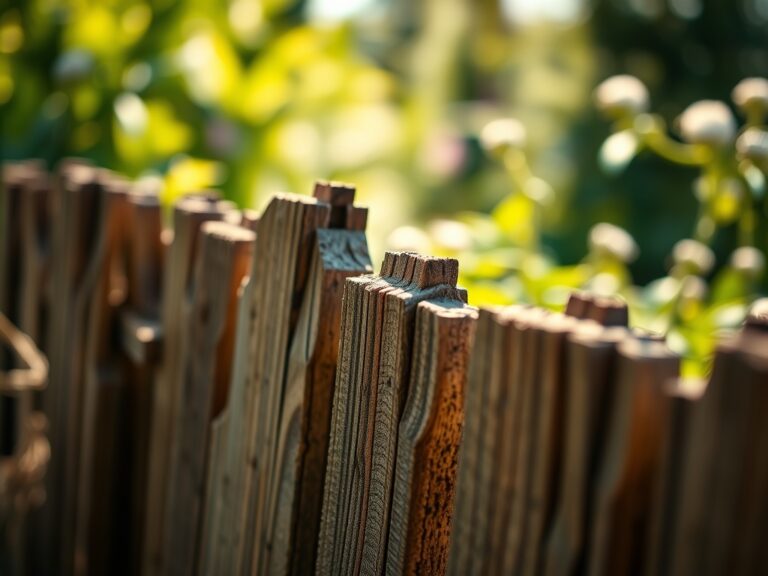
- #57 Limestone: These are 1 inch washed stones. They provide the highest void space for rapid water infiltration.
- #8 Limestone: Measuring roughly 1/2 inch, these chips balance walking comfort with moderate drainage.
- Crushed 411: A mix of dust and small chips; it packs tightly and is best for base layers rather than surface drainage.
- Decomposed Limestone: High surface area; best for arid regions where moisture retention is slightly more desirable.
- Screened 1/4 inch Chips: Excellent for secondary paths with lower foot traffic.
- Angular Rip-Rap: Large 3 to 6 inch stones used for drainage swales alongside paths.
- White Dolomitic Limestone: High magnesium content; provides a bright aesthetic with high reflectivity.
- Oolitic Limestone: Highly porous; ideal for regions with extreme rainfall.
Timing:
Path construction and the integration of limestone should align with your local frost dates. In Hardiness Zones 4 through 7, the ideal window is late spring after the ground has thawed and reached a consistent temperature of 50 degrees Fahrenheit. This prevents the limestone from sinking into "heaving" soil caused by the freeze-thaw cycle.
Understanding the biological clock of your garden is essential when installing paths. During the transition from the vegetative stage to the reproductive stage, plants redirect energy from leaf production to flowering. Installing heavy limestone paths during the peak of the reproductive stage can cause mechanical stress to root systems extending under the path. Aim for installation during the early vegetative stage when root regeneration is at its highest potential.
Phases:

Sowing the Foundation
Before laying stone, the subgrade must be compacted to a 95 percent Proctor density. Excavate to a depth of 6 inches. Lay a non-woven geotextile fabric to prevent the limestone from migrating into the native soil. This fabric maintains the integrity of the drainage layers by preventing "fines" from clogging the pore spaces between the larger stones.
Pro-Tip: Proper compaction prevents air pockets that lead to anaerobic conditions. This supports mycorrhizal symbiosis in the surrounding soil by ensuring that oxygen can still reach the lateral roots of nearby perennials.
Transplanting the Aggregate
Fill the first 4 inches with #57 limestone. This creates a reservoir for excess water. Level the stone using a steel rake. Ensure a 2 percent cross-slope to direct water away from the center of the path and toward the garden beds. This mechanical slope utilizes gravity to prevent surface tension from holding water in place.
Pro-Tip: Use angular chips rather than rounded stones. The angular edges lock together through friction; this prevents the stones from shifting under weight, a process known as mechanical stabilization.
Establishing the Surface
The final 2 inches should consist of #8 limestone chips. This smaller aggregate fills the surface gaps of the larger base layer while remaining porous. Use a plate compactor to set the stones. The resulting surface should be firm but allow water to disappear instantly upon contact.
Pro-Tip: Maintaining a clear path surface prevents auxin suppression in low-growing groundcovers. When paths are clear, light hits the edges of the beds consistently, promoting lateral growth through phototropism.
The Clinic:
Path drainage issues often manifest as physiological disorders in nearby plants. Monitor these symptoms:
- Symptom: Edema. Small bumps or blisters on the underside of leaves.
Solution: This is caused by high root pressure and low transpiration. Improve path drainage with #57 limestone to lower the local water table. - Symptom: Root Rot (Phytophthora). Soft, brown roots and wilting despite wet soil.
Solution: Increase the depth of the limestone base to 8 inches to pull moisture away from the root flare. - Symptom: Iron Chlorosis. Yellowing of new leaves while veins remain green.
Solution: Limestone increases pH, which locks up iron. Apply a chelated iron supplement to the soil and use a soil moisture meter to ensure you are not over-watering.
Fix-It for Nitrogen Chlorosis: If the path runoff is too high, it can leach nitrogen from the soil. Apply a slow-release 20-10-10 fertilizer to the margins of the path to replace lost nutrients.
Maintenance:
A high-performance drainage path requires active management. Use a hori-hori knife to remove any weeds that germinate in the limestone fines; this prevents organic matter from building up and clogging the drainage voids. Check the path integrity after any rain event exceeding 2 inches.
Monitor the surrounding vegetation with bypass pruners to ensure that overhanging foliage does not drop excessive leaf litter onto the stone. Leaf decomposition creates "duff" that fills the gaps between stones, reducing hydraulic conductivity. Ensure the garden receives 1.5 inches of water per week at the drip line, but keep the path itself dry. Use a soil moisture meter at the path's edge to confirm that the limestone is successfully diverting water rather than oversaturating the adjacent rhizosphere.
The Yield:
While limestone paths are structural, they influence the yield of nearby edible crops. In alkaline-loving crops like lavender or asparagus, the calcium leaching from the limestone can actually improve harvest quality. Harvest these crops when the dew has dried but before the heat of the day to maintain maximum turgor pressure.
For cut flowers along the path, use a sharp blade to make a 45-degree cut and immediately plunge the stems into 40-degree Fahrenheit water. This preserves the "day-one" freshness by slowing the rate of senescence and maintaining the vascular flow within the xylem.
FAQ:
What is the best limestone size for drainage?
For primary drainage, #57 limestone (1 inch) is superior. It provides large void spaces that allow high volumes of water to pass through quickly. For the top walking layer, #8 chips (1/2 inch) offer the best balance.
How does limestone affect soil pH?
Limestone is calcium carbonate, which raises soil pH. This makes the soil more alkaline. In garden paths, this can benefit alkaline-loving plants but may require soil amendments for acid-loving species like azaleas or blueberries.
Do I need a fabric liner under limestone?
Yes. A non-woven geotextile fabric is essential. It prevents the limestone from mixing with the soil, which would otherwise clog the drainage gaps and cause the path to sink over time.
How deep should a limestone path be?
A functional drainage path should be at least 6 inches deep. This includes a 4-inch base layer of larger aggregate and a 2-inch surface layer of smaller chips for stability and comfort.